Cutting Board Plans PDF: A Comprehensive Guide (Updated 02/06/2026)
Discover a wealth of free and paid cutting board plans in PDF format, offering DIY instructions and designs for all skill levels, from beginner to advanced woodworkers!
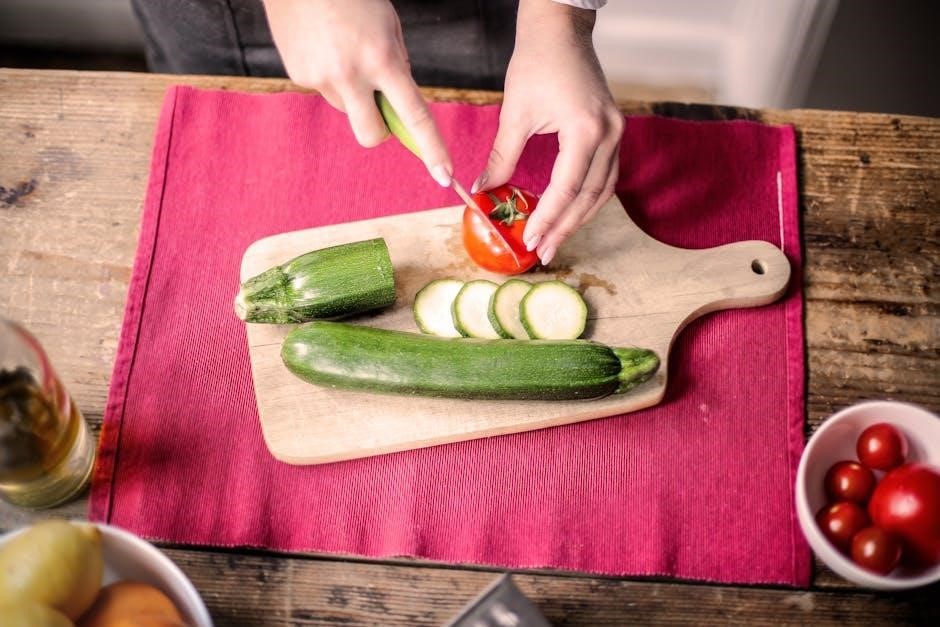
Embarking on cutting board construction is a rewarding woodworking journey, blending functionality with artistry. PDF plans simplify this process, providing detailed diagrams and instructions for various designs. Whether you’re a novice or experienced crafter, these plans unlock the potential to create stunning, durable boards.
From simple edge-grain boards to intricate end-grain butcher blocks, PDF plans cater to diverse skill levels. They often include material lists, cutting diagrams, and step-by-step assembly guides, ensuring a successful build. Explore free and premium options to find the perfect plan for your project!
Why Use PDF Plans for Cutting Boards?
PDF plans offer unparalleled convenience and clarity for cutting board projects. They’re easily downloadable, printable, and accessible on any device, eliminating the need for bulky paper manuals. Detailed diagrams and precise measurements minimize errors, ensuring accurate cuts and a professional finish.
Furthermore, PDFs often include material lists and cutting diagrams, streamlining the preparation process. Many plans also feature 3D models, like Sketchup files, providing a visual understanding of the construction. This accessibility makes PDF plans ideal for woodworkers of all levels.

Types of Cutting Boards & Corresponding Plans
Explore diverse cutting board styles – end grain, edge grain, face grain, and butcher block – each with unique PDF plans catering to varying skillsets.
End Grain Cutting Board Plans
End grain cutting boards are renowned for their durability and knife-friendliness, showcasing beautiful wood patterns. PDF plans for these boards often include detailed diagrams for arranging wood pieces, creating a checkerboard or brick-like design. Many free and paid resources offer plans for varying sizes and complexity, from simple squares to elaborate geometric shapes.
Tutorials guide you through the process of making an end grain board with multiple wood species, like maple, walnut, and cherry. Some plans even include SketchUp models for visualization. These plans emphasize precise cutting and gluing techniques to ensure a lasting, functional, and visually appealing cutting surface.
Edge Grain Cutting Board Plans
Edge grain cutting boards are a popular choice for beginners due to their simpler construction. PDF plans for these boards typically involve joining wood pieces side-by-side, revealing the wood’s edge grain. Numerous free plans are available online, offering various sizes and shapes, from rectangular to rounded designs.
DIY instructions often focus on achieving a flat, stable surface through careful gluing and clamping. Paid plans may include more intricate designs and detailed guidance on wood selection and finishing techniques. These plans are a great starting point for learning basic woodworking skills.
Face Grain Cutting Board Plans
Face grain cutting boards showcase the wood’s surface, offering a visually appealing aesthetic. PDF plans for these boards are readily accessible, often featuring simpler designs ideal for novice woodworkers. Free downloadable patterns include basic rectangular shapes and those with gentle curves, providing easy-to-follow instructions.
DIY guides emphasize proper wood selection and sanding techniques to achieve a smooth, food-safe surface. Paid plans may offer more complex designs and detailed finishing advice, enhancing both beauty and durability.
Butcher Block Cutting Board Plans
Butcher block cutting boards, known for their robustness and substantial size, require detailed PDF plans. These plans often involve joining multiple wood pieces to create a thick, durable surface. DIY enthusiasts can find plans ranging from simple, large rectangles to more elaborate designs with juice grooves.
Paid resources frequently provide Sketchup models alongside the PDF, aiding visualization. Plans emphasize strong glue joints and proper clamping techniques for lasting stability. Expect detailed material lists and cutting diagrams for efficient construction.

Materials Needed for Cutting Board Projects
Essential materials include quality wood, food-safe glue, and finishes. PDF plans detail specific wood types, adhesive recommendations, and protective oil choices for longevity.
Wood Selection: Best Types for Cutting Boards
Choosing the right wood is crucial for a durable and safe cutting board. PDF plans often specify hardwoods like maple, walnut, cherry, and beech due to their tight grain and resistance to bacteria. Avoid softwoods like pine, as they can harbor bacteria and dull knives quickly.
Maple is a popular choice for its affordability and durability, while walnut offers a rich color and aesthetic appeal. Cherry provides a beautiful reddish hue, and beech is known for its strength. Always ensure the wood is kiln-dried to prevent warping and cracking, as detailed in many PDF guides.
Adhesives: Choosing the Right Wood Glue
Selecting a food-safe wood glue is paramount when constructing cutting boards, as detailed in many PDF plans. Titebond III Ultimate Wood Glue is a widely recommended option, offering excellent water resistance and a strong bond. Avoid using standard carpenter’s glue, as it may contain harmful chemicals.
PDF guides emphasize the importance of applying glue evenly and clamping the boards securely. Ensure the glue is fully cured before sanding and finishing. Proper adhesion is vital for the longevity and structural integrity of your cutting board, as highlighted in comprehensive PDF instructions.
Finishes: Food-Safe Options for Protection
PDF cutting board plans consistently recommend food-safe finishes to protect the wood and prevent bacterial growth. Mineral oil is a popular choice, easily applied and requiring regular reapplication. Beeswax and mineral oil blends offer enhanced protection and a subtle sheen, as detailed in many downloadable guides.
Avoid varnishes and polyurethanes, as they are not food-safe. PDF instructions often include guidance on application techniques and drying times. A properly finished cutting board, built following PDF plans, will be durable and hygienic for years.
Tools Required for Cutting Board Making
PDF plans detail essential tools: saws, sanders, clamps, and measuring devices. Power tools expedite the process, while hand tools offer precision and control for crafting.
Essential Hand Tools
PDF cutting board plans frequently emphasize the importance of foundational hand tools for precision work. A sharp hand saw is crucial for accurate cuts, especially when power tools aren’t accessible. Smoothing planes refine surfaces, while chisels aid in detailed shaping and joinery.
Measuring tools like rulers, squares, and marking gauges ensure accuracy. Hand sanding blocks, paired with various grits of sandpaper, achieve a flawlessly smooth finish. These tools, often detailed within PDF guides, provide control and a tactile connection to the wood, enhancing the crafting experience.
Power Tools for Efficient Cutting
PDF cutting board plans often suggest power tools to expedite the building process. A table saw delivers precise, repeatable cuts for boards and edging. A miter saw efficiently handles crosscuts, while a bandsaw excels at curved shapes and resawing thicker stock.
Power sanders, like random orbital sanders, dramatically reduce sanding time. Router usage, detailed in some PDFs, allows for creating juice grooves or decorative edges. Utilizing these tools, alongside careful planning, streamlines construction.
Clamping & Measuring Tools
PDF cutting board plans consistently emphasize the importance of accurate measurements and secure clamping. A reliable tape measure and combination square are essential for precise wood cutting. Parallel clamps are crucial for applying even pressure during glue-ups, preventing warping.
Various clamp types, detailed in some plans, ensure a strong bond. A digital angle finder aids in accurate miters. Consistent measurements, guided by the PDF, and robust clamping are vital for a durable, high-quality cutting board.
Step-by-Step Guide to Building a Basic Cutting Board (Using PDF Plans)
Follow your chosen PDF plan’s instructions for wood preparation, cutting, gluing, clamping, sanding, and finishing to create a functional, beautiful cutting board!
Preparing the Wood
Begin by carefully selecting lumber according to your PDF plan’s specifications, ensuring it’s dry and free of defects. Mill the wood to the required thickness, often using a jointer and planer for consistent results. Acclimate the wood to your workshop’s humidity for several days to minimize warping or movement later. Inspect each board for knots, cracks, or other imperfections that might compromise the cutting board’s integrity. Cut the wood slightly oversized initially, allowing room for final trimming and squaring during assembly, as detailed in your chosen PDF plans.
Cutting the Wood to Size
Precisely cut the wood pieces to the dimensions outlined in your PDF cutting board plan, utilizing a table saw, miter saw, or circular saw for accurate cuts. Prioritize safety by employing push sticks and appropriate safety gear. Double-check measurements before each cut to avoid costly errors. Ensure square cuts for tight-fitting joints during glue-up. Label each piece according to the plan for easy identification during assembly. Slightly oversize initially, allowing for final adjustments and sanding to achieve perfect dimensions, as shown in the PDF.
Gluing and Clamping the Boards
Apply a generous, even coat of food-safe wood glue to the joining surfaces, referencing your PDF plan for glue application guidance. Assemble the boards according to the plan’s layout, ensuring proper alignment. Utilize clamps – bar clamps, pipe clamps, or parallel clamps – to apply firm, even pressure across the entire surface. Wipe away excess glue immediately with a damp cloth. Allow the glue to cure completely, typically 24 hours, as specified in the PDF instructions, for a strong, durable bond.
Sanding and Finishing
Begin with coarse-grit sandpaper (80-120) to level the surface, progressing through medium (150-180) and fine grits (220+) for smoothness. Refer to your PDF plan for recommended grit sequences. Thoroughly remove all sanding dust. Apply a food-safe finish – mineral oil, beeswax, or a blend – generously, allowing it to penetrate the wood. Wipe off excess finish. Repeat applications as needed, following the PDF’s guidance, to achieve a protective, beautiful surface.
Advanced Cutting Board Techniques
Explore intricate inlays, elegant juice grooves, and the addition of comfortable handles to elevate your cutting board projects beyond basic PDF plans!
Creating Inlays and Designs
Transform your cutting boards into stunning works of art by incorporating beautiful inlays and intricate designs! PDF plans can guide you through various techniques, from simple geometric patterns to complex pictorial representations. Consider using contrasting wood species for a striking visual effect.
Experiment with different inlay materials like brass, copper, or even colorful resins. Precise cutting and careful fitting are crucial for seamless inlays. Detailed PDF instructions often include templates and step-by-step guidance for achieving professional-looking results, enhancing both the aesthetic appeal and value of your handmade cutting boards.
Adding Juice Grooves
Enhance the functionality of your cutting boards by incorporating juice grooves! PDF plans frequently detail how to create these essential features, preventing liquids from spilling onto your countertops during food preparation. Precise routing is key to achieving clean, consistent grooves.
Utilize a router with a suitable bit, following the guidelines provided in your chosen PDF plan. Consider the depth and width of the groove based on the intended use of the board. Properly executed juice grooves demonstrate attention to detail and elevate the overall usability of your cutting board.
Building Cutting Boards with Handles
Elevate your cutting board designs with integrated handles for easy carrying and pouring! Many PDF plans showcase various handle styles, from simple routed recesses to more elaborate mortise-and-tenon constructions. Consider the weight and size of the board when selecting a handle design.
PDF instructions will guide you through precise measurements and secure attachment methods. Handles improve safety and convenience, making your cutting board a joy to use. Explore plans offering diverse handle options to complement your woodworking skills and aesthetic preferences.
Where to Find Free & Paid Cutting Board Plans (PDF Downloads)
Explore reputable websites and marketplaces offering a diverse selection of cutting board plans in PDF format, both free and for purchase!
Reputable Websites Offering Free Plans
Numerous online resources provide access to free cutting board plans in PDF format, perfect for beginners and experienced woodworkers alike. These sites often feature detailed instructions, material lists, and helpful diagrams. You can download plans for various styles, including end grain, edge grain, and face grain designs.
Websites frequently offer bonus content, such as Sketchup models to visualize the project before building. Remember to always verify the source and ensure the plans are well-documented and easy to follow for a successful build!
Paid Plan Resources & Marketplaces
For woodworkers seeking more intricate or specialized cutting board plans, several paid resources and online marketplaces offer premium options in PDF format. These often include detailed step-by-step guides, advanced techniques like inlays, and unique designs not found in free plans.
Paid plans frequently boast higher-quality illustrations and more comprehensive material lists. Investing in these resources can elevate your projects and provide access to expert woodworking knowledge, ensuring a professional finish.
Safety Considerations When Building Cutting Boards
Prioritize safety with proper woodworking practices, safe glue/finish application, and always wear appropriate protective gear during cutting board construction.
Woodworking Safety Practices
Essential safety measures are paramount when undertaking cutting board projects. Always wear safety glasses to protect your eyes from flying debris during cutting and sanding operations. Utilize a dust mask or respirator to avoid inhaling harmful wood particles.
Ensure your workspace is well-ventilated, especially when applying finishes. Keep tools sharp and in good working order, as dull tools require more force and increase the risk of accidents. Never reach over a running blade, and always unplug power tools before making adjustments or changing blades.
Maintain a clean and organized workspace to prevent trips and falls. Familiarize yourself with the safe operation of each tool before use, and never operate equipment you are not comfortable with.
Safe Glue and Finish Application
Prioritize safety when applying wood glue and finishes. Work in a well-ventilated area to avoid inhaling fumes. Always wear gloves to protect your skin from irritation and potential allergic reactions.
Use only food-safe glues and finishes specifically designed for cutting boards, ensuring they won’t leach harmful chemicals into food. Follow the manufacturer’s instructions carefully regarding application and drying times.
Dispose of used rags properly, as they can spontaneously combust. Avoid open flames or sparks near flammable finishes. Store all chemicals in a secure, labeled container, out of reach of children and pets.

Understanding End Grain vs. Edge Grain Construction
Explore the differences between end grain and edge grain cutting boards, focusing on durability, knife friendliness, and aesthetic qualities for informed plan selection.
Durability and Knife Friendliness
End grain cutting boards are renowned for their exceptional durability, as the wood fibers absorb impact, resisting deep scoring and extending the board’s lifespan. This construction is significantly more knife-friendly; the fibers naturally close around the blade, minimizing dulling.
Edge grain boards, while still robust, present a harder surface, potentially causing more wear on knives over time. Choosing the right PDF plan considering these factors ensures a cutting board that balances longevity with optimal knife care, aligning with your woodworking goals.
Aesthetic Differences
End grain cutting boards display a unique, visually striking pattern of wood fibers, often resembling a checkerboard or mosaic, making each board a distinctive piece. Edge grain boards showcase the long, linear grain of the wood, offering a more traditional and streamlined aesthetic.
PDF plans often highlight these visual contrasts, allowing you to select a design that complements your kitchen’s style. The choice between these grains impacts the board’s overall look, influencing its presentation and appeal.
Maintaining Your Cutting Board
Regular cleaning, oiling, and sanitizing are crucial for longevity; PDF plans often include care instructions to preserve your board’s beauty and function!
Cleaning and Sanitizing
Consistent cleaning prevents bacteria buildup, extending your cutting board’s life. PDF plans sometimes detail recommended cleaning routines. After each use, wash with warm, soapy water and thoroughly dry. For deeper sanitization, occasionally use a diluted vinegar solution or a food-safe cutting board sanitizer. Avoid harsh chemicals or prolonged soaking, which can damage the wood.
Proper drying is essential to prevent warping. Always ensure the board is completely dry before storing. Regular oiling, as often outlined in PDF guides, also contributes to sanitation by filling pores and inhibiting bacterial growth.
Oil Application and Rejuvenation
Regular oiling is crucial for maintaining your cutting board’s beauty and functionality. PDF plans often emphasize this step. Food-grade mineral oil, beeswax blends, or specialized cutting board oils are ideal. Apply liberally, allowing the wood to absorb the oil for several hours, then wipe off any excess.
This process rejuvenates the wood, preventing drying and cracking. Frequent oiling, especially after washing, keeps the board hydrated and food-safe. Following the oiling schedule in your PDF plan ensures long-lasting performance.
Troubleshooting Common Cutting Board Issues
PDF plans can help address warping, cracking, or glue failure. Understanding wood movement and proper finishing techniques, detailed in plans, is key to resolution.
Warping and Cracking
Warping and cracking are common issues, often stemming from uneven moisture content or improper wood selection. PDF plans frequently detail wood species best suited for stability and minimizing movement.
Following plan instructions regarding wood acclimation and drying is crucial. Proper gluing techniques, emphasizing even pressure during clamping (as illustrated in PDF guides), prevent internal stresses. Finishing with food-safe oils regularly helps maintain moisture balance, reducing the likelihood of cracks forming. Detailed plans often address grain orientation to mitigate warping tendencies.
Glue Failure
Glue failure in cutting boards typically arises from insufficient clamping pressure, improper glue application, or using an unsuitable adhesive. PDF plans emphasize selecting a waterproof wood glue specifically designed for food-contact surfaces.
Detailed instructions within PDF guides illustrate optimal glue spread and clamping techniques, ensuring complete wood-to-wood contact. Proper surface preparation – clean, smooth surfaces – is vital for a strong bond. Following recommended drying times, as outlined in the plans, prevents premature stress on the joints, avoiding future failures.
Customer Gallery & Inspiration
Browse stunning finished cutting board projects crafted using PDF plans! View customer creations for design ideas and inspiration to elevate your woodworking skills.
Showcasing Finished Cutting Board Projects
Explore a diverse collection of cutting boards brought to life through readily available PDF plans! Witness the beauty of end-grain, edge-grain, and face-grain designs, demonstrating the versatility of downloadable resources. See how fellow woodworkers have personalized their boards with inlays, juice grooves, and unique handle additions.
Admire the craftsmanship and attention to detail, inspiring your own creations. Discover the potential of free and paid plans, transforming simple diagrams into functional art. Find motivation and refine your techniques by examining these exceptional examples of woodworking skill!