Singer 99K Sewing Machine: A Comprehensive Guide
Discover the enduring legacy of the Singer 99K! Accessing a PDF instruction manual is crucial; numerous online resources offer free downloads for this classic machine․
Explore manuals for the 99 and 99K classes‚ alongside service manuals available on CD‚ ensuring seamless operation and maintenance of your vintage Singer․
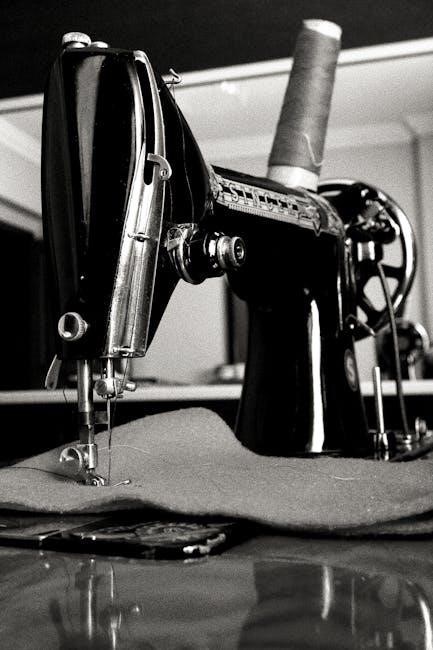
The Singer 99K‚ a cornerstone of mid-20th century sewing‚ represents a remarkable blend of durability‚ functionality‚ and elegant design․ Introduced in the 1950s‚ this machine quickly became a favorite among home sewers‚ renowned for its robust construction and ability to handle a wide variety of fabrics; Its popularity stems from its versatility – capable of both straight and zigzag stitching‚ making it suitable for diverse projects from garment construction to quilting․
Understanding the Singer 99K begins with recognizing its enduring appeal and the importance of proper operation․ Fortunately‚ a wealth of information exists to support owners‚ particularly in the form of original instruction manuals․ These manuals‚ often available as PDF downloads online‚ are invaluable resources for both novice and experienced users․ Locating a manual specific to the 99K (or the closely related 99) is the first step towards unlocking the machine’s full potential․ Service manuals‚ offering detailed repair information‚ are also accessible‚ often on CD format‚ providing a deeper dive into the machine’s mechanics․
Whether you’ve inherited a family heirloom or acquired a vintage Singer 99K‚ accessing these resources will ensure years of reliable sewing enjoyment․
Historical Context of the 99K Model
The Singer 99K emerged during a pivotal era in sewing machine history‚ the 1950s‚ a time of post-war optimism and a burgeoning home sewing movement․ Singer‚ already a dominant force‚ aimed to cater to a growing demand for versatile and reliable machines for domestic use․ The 99K represented a significant advancement‚ incorporating features previously found on more expensive industrial models‚ but packaged in a user-friendly‚ home-focused design․
Interestingly‚ the availability of original documentation‚ like the PDF instruction manuals‚ reflects the company’s commitment to supporting its customers even decades later․ These manuals weren’t simply guides; they were part of Singer’s strategy to build brand loyalty and ensure long-term usability of their products․ The enduring presence of these manuals online today speaks to the machine’s lasting popularity and the dedication of a community committed to preserving its legacy․
The 99K’s design coincided with a shift towards more streamlined aesthetics‚ and its robust build quality ensured it became a trusted companion for generations of sewers․ Accessing these historical manuals provides insight into the machine’s original intent and optimal operation․
Identifying Your Singer 99K (Serial Numbers & Variations)
Accurately identifying your Singer 99K is crucial‚ especially when sourcing parts or referencing the correct PDF instruction manual․ Serial numbers‚ typically found on a plate on the machine’s body‚ provide valuable clues about its manufacturing date and potential variations․ Different production runs may have subtle differences in features or components․
While the core functionality remained consistent‚ variations existed‚ such as the 99K-24 model‚ often referenced in parts lists and manuals․ Knowing your specific variation ensures you’re using the most appropriate documentation․ The availability of detailed parts lists‚ like the 25-page Singer 99-24 guide‚ highlights the importance of precise identification․
Consulting online forums and communities dedicated to vintage Singer machines can also help decipher serial numbers and identify unique characteristics․ Having the correct manual‚ matched to your machine’s specifics‚ will maximize your sewing experience and facilitate proper maintenance․
Understanding the Manual & Key Features
Dive into the Singer 99K manual – a gateway to mastering this machine! PDF versions unlock detailed diagrams and instructions for optimal performance․
Locating a Singer 99K Instruction Manual (PDF & Online Resources)
Finding a Singer 99K instruction manual can significantly enhance your sewing experience․ Fortunately‚ numerous online resources provide access to these valuable guides․ Many websites offer PDF downloads of original manuals for the Singer Class 99 and 99K models‚ allowing you to easily study the machine’s operation at your convenience․
Several platforms host scanned copies of these vintage manuals‚ ensuring their preservation and accessibility․ You can often find these manuals through online sewing machine forums‚ dedicated Singer enthusiast websites‚ and archive․org․ Additionally‚ comprehensive service manuals‚ sometimes available on CD in PDF format‚ offer detailed repair and maintenance information – a boon for those tackling more complex issues․
Remember to search specifically for “Singer 99K manual PDF” or “Singer Class 99 instruction manual” to refine your search results․ These resources empower you to understand your machine’s features and maintain it for years to come․
Essential Parts of the Singer 99K
Understanding the key components of the Singer 99K is vital for operation and maintenance․ The machine features a robust cast iron body‚ providing stability during sewing․ The handwheel controls the stitching speed‚ while the presser foot applies pressure to the fabric․ A crucial element is the shuttle‚ responsible for forming the lockstitch‚ and requires regular bobbin winding․
The feed dogs advance the fabric under the needle‚ ensuring consistent stitch length․ The tension discs regulate thread tension‚ preventing looping or puckering․ The needle clamp securely holds the needle‚ and the spool pin guides the thread from the spool․ Familiarizing yourself with these parts‚ often detailed in the instruction manual‚ allows for efficient troubleshooting and adjustments․
Proper identification of each component‚ as outlined in the 99K’s parts list‚ is essential for ordering replacements and performing repairs․ Knowing these parts empowers confident use and longevity of this classic machine․
Threading the Singer 99K: A Step-by-Step Guide
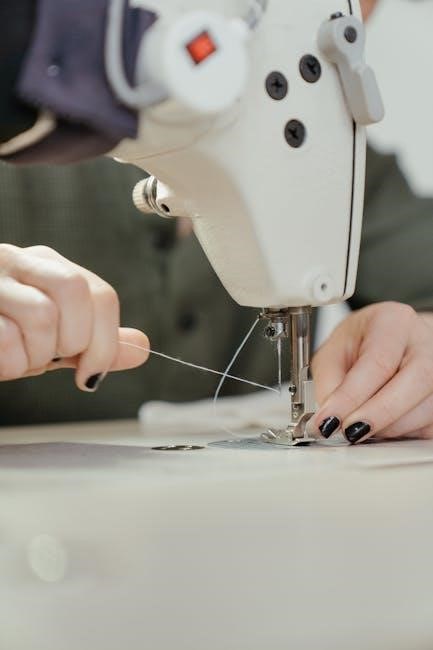
Correct threading is paramount for optimal Singer 99K performance․ Begin by placing the spool on the spool pin‚ guiding the thread through the upper tension discs․ Ensure the thread is firmly seated between the discs for consistent tension․ Next‚ lead the thread down through the take-up lever‚ then to the needle clamp‚ and finally‚ thread the needle from front to back․
Simultaneously‚ wind a bobbin and insert it into the shuttle․ Draw the bobbin thread up‚ ensuring it catches the presser foot․ The instruction manual provides detailed diagrams illustrating this process․ Proper threading prevents skipped stitches and thread breakage․
Always refer to the manual for visual guidance‚ as variations may exist․ A correctly threaded machine will produce even‚ balanced stitches‚ maximizing the sewing experience and preserving the machine’s functionality․
Operation & Maintenance
Regular maintenance‚ guided by the instruction manual‚ ensures longevity․ Proper oiling and cleaning‚ alongside understanding basic techniques‚ keeps your Singer 99K running smoothly․
Basic Sewing Techniques with the 99K
Mastering fundamental sewing techniques with your Singer 99K begins with a thorough understanding of its mechanics‚ detailed within the instruction manual․ This vintage machine excels at straight stitching‚ ideal for garment construction and quilting․
Begin by practicing consistent seam allowances‚ utilizing the presser foot as a guide․ The manual illustrates proper fabric feeding and tension adjustments for optimal stitch formation․ Learn to backstitch securely at the beginning and end of seams to prevent unraveling․
Experiment with different fabric weights‚ referencing the manual for recommended needle sizes and thread types․ The 99K’s robust design handles a variety of materials‚ from lightweight cottons to heavier denims․ Consistent practice‚ guided by the manual’s instructions‚ will quickly build your confidence and skill․
Remember to always test stitch settings on scrap fabric before beginning your project‚ ensuring a professional finish․ The Singer 99K‚ when properly understood and maintained‚ is a versatile tool for all your sewing needs․
Adjusting Stitch Length and Width
The Singer 99K‚ while primarily a straight-stitch machine‚ offers adjustments for stitch length‚ crucial for various fabric types and sewing applications․ Your instruction manual details the location of the stitch length lever‚ typically found on the machine bed;
Experiment with shorter stitch lengths for delicate fabrics or when increased seam strength is required․ Longer stitch lengths are ideal for basting or gathering․ The manual provides guidance on correlating stitch length to fabric weight and intended use․
Although the 99K doesn’t offer adjustable stitch width in the same way as zigzag machines‚ understanding the stitch length control is paramount․ Precise adjustments ensure even‚ consistent stitches‚ preventing puckering or thread breakage․
Refer to the manual’s diagrams for a clear visual representation of the adjustment mechanism․ Consistent testing on scrap fabric is recommended to master the impact of each setting before applying it to your final project․
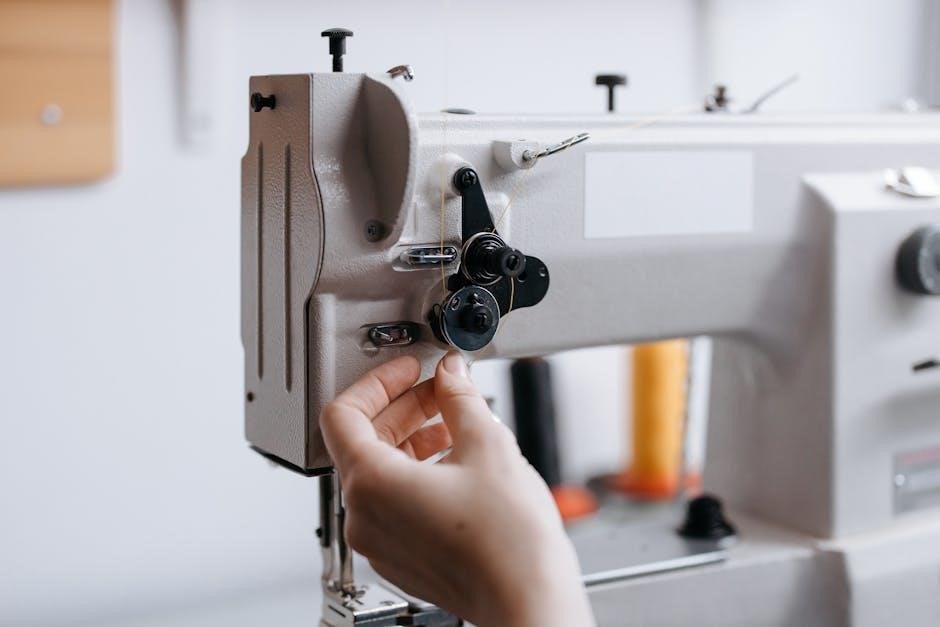
Bobbin Winding and Insertion
Proper bobbin winding is essential for consistent sewing on your Singer 99K․ The instruction manual illustrates the bobbin winding mechanism‚ typically involving placing the bobbin on a spindle and engaging a rubber tire with the handwheel․
Ensure the thread is correctly guided through the tension discs during winding to achieve even tension․ Over or under-tension will lead to poor stitch quality․ The manual details the correct thread path for optimal winding․
Once wound‚ the bobbin is inserted into the side-loading bobbin case․ The manual provides clear diagrams showing the correct orientation and insertion technique․ A properly seated bobbin is crucial for smooth operation․
Thread the bobbin thread through the tension spring within the bobbin case‚ following the manual’s guidance․ Incorrect threading will cause issues like looping or thread nests․ Practice makes perfect – refer to the manual frequently!
Troubleshooting Common Issues (Thread Breakage‚ Skipped Stitches)
Thread breakage on a Singer 99K often stems from incorrect threading‚ a dull needle‚ or improper tension․ The instruction manual details the correct threading path and tension settings; Always use quality thread appropriate for your fabric․
Skipped stitches frequently indicate a bent or damaged needle‚ incorrect needle size for the fabric‚ or timing issues․ The manual guides you through selecting the correct needle and checking its condition․
If experiencing issues‚ re-thread the entire machine‚ ensuring the thread is securely seated in all tension discs and guides․ Consult the manual’s diagrams for clarity․
Regular cleaning and oiling‚ as outlined in the manual‚ prevent friction and ensure smooth operation‚ minimizing these common problems․ A well-maintained machine is less prone to errors․
Remember to always disconnect the power before performing any maintenance!

Advanced Techniques & Accessories
Unlock the 99K’s full potential! The instruction manual reveals how to utilize various presser feet and explore decorative stitching options for creative projects․
Using Different Presser Feet
The Singer 99K‚ despite its age‚ boasts versatility enhanced by a range of presser feet․ Your instruction manual is key to understanding each foot’s specific function and proper installation․ Beyond the standard zig-zag foot‚ explore options like the narrow zig-zag foot for delicate applications‚ and the rolled hem foot for creating professional-looking edges on lightweight fabrics․
Understanding the manual’s diagrams will demonstrate how to securely attach and detach each foot‚ ensuring smooth fabric feeding․ Different feet are crucial for techniques like darning‚ buttonholes‚ and even free-motion embroidery․ The manual will detail which foot is best suited for each task‚ preventing skipped stitches or fabric damage․
Consider sourcing additional presser feet – many vintage and modern options are compatible․ The manual may not cover every available foot‚ but it provides the foundational knowledge to experiment and expand your sewing capabilities with this remarkable machine․
Decorative Stitching Capabilities
The Singer 99K‚ while known for its robust straight stitching‚ possesses surprising decorative capabilities․ Your instruction manual unlocks these features‚ detailing how to adjust stitch width and length to create a variety of patterns․ Explore the zig-zag stitch’s potential – varying the settings produces a range of decorative effects‚ from simple embellishments to more complex designs․
The manual will guide you through creating decorative seams and applying patterns to fabric․ Experiment with different thread weights and colors to enhance the visual impact․ While not a dedicated embroidery machine‚ the 99K can achieve charming decorative results with patience and practice․
Remember to test stitch settings on scrap fabric before applying them to your project․ The manual’s stitch samples serve as a valuable reference point․ Discover the creative possibilities within this vintage machine and personalize your sewing projects with unique decorative touches!
Oiling and Cleaning Your Singer 99K
Maintaining your Singer 99K is vital for its longevity․ Your instruction manual emphasizes regular oiling – a key component of preventative maintenance․ It details specific oiling points‚ ensuring smooth operation and preventing rust․ Use a sewing machine oil‚ applying it sparingly to moving parts like the bobbin area‚ shuttle hook‚ and linkages․
Cleaning is equally important․ The manual advises removing lint and dust buildup with a brush after each use․ Periodically‚ a more thorough cleaning is needed‚ carefully removing the needle plate and cleaning beneath․ Avoid using harsh chemicals; a soft cloth and gentle brush are sufficient․
Refer to the manual for guidance on disassembling parts for cleaning‚ if necessary․ Proper oiling and cleaning‚ as outlined in the manual‚ will keep your Singer 99K running smoothly for generations to come‚ preserving its classic performance․

Parts & Repair
Locate Singer 99K parts lists online and through retailers․ The instruction manual aids identification; replacement parts ensure continued functionality and preserve this vintage machine․
Singer 99K Parts List and Availability
Securing replacement parts for your Singer 99K often begins with a detailed parts list․ Fortunately‚ comprehensive lists‚ like the Singer 99-24 Parts List Guide (spanning 25 pages)‚ are readily available online; These guides are invaluable for identifying the specific component you need‚ using diagrams and part numbers․
Availability varies‚ but numerous online retailers specialize in vintage sewing machine parts․ Websites frequently stock items like bobbins‚ needles‚ belts‚ and even more intricate components such as gears and shuttle hooks․ The instruction manual itself can assist in correctly identifying the part needed‚ referencing diagrams and descriptions․
Consider joining online Singer sewing machine communities and forums․ Members often share sources for hard-to-find parts and offer advice on repair․ Don’t hesitate to consult the service manual (available on CD in PDF format) for exploded views and detailed part breakdowns‚ further simplifying the identification process․
Finding Replacement Parts Online
Locating replacement parts for your Singer 99K is significantly easier thanks to the internet․ Numerous online vendors specialize in vintage sewing machine components‚ offering a wide selection of parts․ A crucial first step is referencing your Singer 99K instruction manual to identify the correct part number and description․
Websites like eBay and Etsy frequently host listings from individual sellers and dedicated vintage parts suppliers․ Specialized sewing machine parts retailers also maintain extensive online catalogs․ When searching‚ be precise with your keywords – “Singer 99K [part name]” will yield more accurate results․
Before purchasing‚ carefully review the seller’s feedback and the part’s condition․ Comparing prices across multiple vendors is also advisable․ Remember that a service manual (often available as a PDF download) can provide detailed diagrams to confirm you’re ordering the correct component for your specific 99K variation․
Basic Maintenance and Repair Tips
Regular maintenance‚ guided by your Singer 99K instruction manual‚ is key to longevity․ Frequent cleaning prevents lint buildup‚ ensuring smooth operation․ Always unplug the machine before any maintenance! Lightly oiling key moving parts – as detailed in the manual – reduces friction and wear․
For minor issues‚ the manual’s troubleshooting section is invaluable․ Common problems like thread breakage or skipped stitches often stem from incorrect threading or a dull needle․ Refer to the diagrams in the manual for proper threading techniques․
If a part breaks‚ consulting a service manual (available in PDF format online) can aid in disassembly and repair․ However‚ complex repairs are best left to qualified sewing machine technicians․ Remember to always use the correct replacement parts‚ identified using the manual’s parts list․