Hyper Tough HT100 Code Reader Manual: A Comprehensive Guide
This manual comprehensively details the Hyper Tough HT100 OBD2 code reader, covering setup, operation, troubleshooting, and specifications for optimal vehicle diagnostics and maintenance․
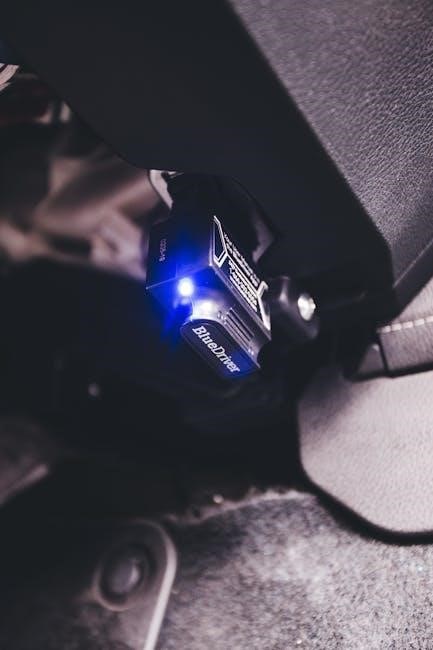
The Hyper Tough HT100 Code Reader is a diagnostic tool designed for use with vehicles manufactured from 1996 onwards that support the OBD2 (On-Board Diagnostics II) protocol․ This handheld scanner empowers users to retrieve and interpret diagnostic trouble codes (DTCs) directly from their vehicle’s computer․ It’s a valuable asset for both seasoned mechanics and DIY enthusiasts seeking to understand and address vehicle issues․

The HT100’s primary function is to read both generic and manufacturer-specific codes, providing insights into potential problems affecting the engine and related systems․ Beyond code retrieval, it also facilitates the clearing of the Check Engine Light, a crucial step after repairs have been completed․ Its simple interface, featuring an eraser and DTC button, makes it user-friendly, despite the limited availability of a dedicated, comprehensive manual․

What is an OBD2 Code Reader?
An OBD2 (On-Board Diagnostics II) code reader is a diagnostic tool used to access information from a vehicle’s onboard computer system․ Since 1996, all cars and light trucks sold in the United States have been required to be OBD2 compliant, standardizing the diagnostic connector and the types of data available․ These readers interpret data related to engine performance, emissions systems, and other critical vehicle functions․
Essentially, when a problem arises, the vehicle’s computer stores a Diagnostic Trouble Code (DTC)․ An OBD2 code reader connects to the vehicle’s DLC (Data Link Connector) – typically located under the dashboard – and retrieves these codes․ The reader then displays the code, often accompanied by a brief description, allowing users to pinpoint the source of the issue․ Readers like the Hyper Tough HT100 can also erase these codes after repairs․
Compatibility: Vehicles Supported by HT100
The Hyper Tough HT100 Code Reader is designed to work with a wide range of vehicles, specifically those manufactured from 1996 onwards․ This is because 1996 marked the year that the OBDII (On-Board Diagnostics II) system became standardized across most car models sold in the United States․ The HT100 supports both domestic and import vehicles, encompassing makes like Ford, Chevrolet, Toyota, Honda, Nissan, and many others․
It’s capable of reading both generic OBD2 codes, which are standardized across all vehicles, and manufacturer-specific codes․ However, compatibility can vary slightly depending on the vehicle’s make and model․ While generally compatible with cars, light trucks, SUVs, and minivans, some hybrid and electric vehicles may have limited support․ Always consult vehicle documentation for specific compatibility details․
Initial Setup and Powering On
Before using the Hyper Tough HT100, ensure it’s adequately charged or connected to a power source․ The device operates via a USB connection, allowing it to draw power directly from your vehicle’s OBDII port or a USB power adapter․ No initial software installation is typically required; the HT100 is generally ready to use out of the box․
To power on the device, simply plug the HT100’s diagnostic connector into your vehicle’s OBDII port, usually located under the dashboard․ The unit will automatically power on upon connection, displaying a welcome screen or initiating a self-test․ If it doesn’t power on, verify the connection is secure and try a different USB port if applicable․ The display will illuminate, indicating the device is ready for operation․
Understanding the HT100 Display
The Hyper Tough HT100 features a straightforward display designed for ease of use․ The screen typically presents a menu-driven interface, allowing navigation through various functions like reading codes, erasing faults, and accessing live data․ Key information displayed includes Diagnostic Trouble Codes (DTCs), their definitions, and vehicle status parameters․

The display utilizes a combination of text and potentially icons to convey information․ Common elements include a code display area, a definition section explaining the code’s meaning, and buttons for navigating the menu․ The screen’s brightness may be adjustable․ Familiarize yourself with the button layout – typically, there’s an ‘Enter’ or ‘OK’ button for selection, and arrow keys for scrolling․ Understanding these basic elements is crucial for effective operation․
Reading Diagnostic Trouble Codes (DTCs)
To read DTCs with the Hyper Tough HT100, first ensure the vehicle is in a key-on, engine-off state․ Connect the scanner to the OBD2 port, usually located under the dashboard․ Power on the HT100 using the power button․ Navigate the menu using the arrow keys to select the “Read Codes” or similar option․ The scanner will then communicate with the vehicle’s computer and retrieve any stored DTCs․
The HT100 will display each code, often as a five-character alphanumeric identifier (e․g․, P0300)․ The display will also provide a brief description of the code․ It’s important to note that multiple codes may be present, indicating several potential issues․ Cycle through the codes using the arrow keys to review all stored faults․ Record these codes for further interpretation․

Interpreting DTCs: Generic vs․ Manufacturer-Specific
Diagnostic Trouble Codes (DTCs) fall into two main categories: generic and manufacturer-specific․ Generic codes, beginning with ‘P0’ (e․g․, P0300 for random/multiple cylinder misfire), are standardized across all OBD2-compliant vehicles․ These codes provide a general indication of the problem area․ The Hyper Tough HT100 reads both types․
Manufacturer-specific codes, starting with ‘P1’, ‘C0’, ‘B0’, or ‘U0’, are unique to a particular vehicle brand․ These codes offer more detailed information about the issue, often pinpointing the exact component or system involved․ Interpreting these requires access to a database specific to the vehicle’s manufacturer․ While the HT100 displays these codes, a repair manual or online database is crucial for accurate diagnosis․ Understanding this distinction is vital for effective troubleshooting․
Erasing Check Engine Lights
The Hyper Tough HT100 allows you to erase stored Diagnostic Trouble Codes (DTCs), effectively turning off the Check Engine Light․ However, simply erasing the light doesn’t fix the underlying problem; it only removes the symptom․ It’s crucial to diagnose and repair the issue before clearing the code․ Otherwise, the light will likely reappear․
The erase function resets the vehicle’s On-Board Diagnostics (OBD) system, preparing it for retesting after repairs․ After erasing, a drive cycle may be required for the system to fully re-evaluate and confirm the repair․ Always consult your vehicle’s repair manual for specific drive cycle procedures․ Remember, erasing codes without addressing the root cause is a temporary fix and can mask potentially serious issues․

The DTC Erase Function: Precautions
Before utilizing the DTC erase function on the Hyper Tough HT100, several precautions must be observed․ Erasing codes without proper diagnosis can hinder identifying intermittent problems, as the system’s memory of the fault is cleared․ It’s vital to record all retrieved DTCs before erasing them for future reference and potential repair verification․
Furthermore, ensure the vehicle has undergone necessary repairs․ Clearing a code doesn’t fix the issue; it merely prevents the Check Engine Light from illuminating․ Post-repair, a drive cycle is often required to confirm the fix․ Be aware that erasing codes may affect vehicle emissions testing results if the underlying problem persists․ Always prioritize diagnosis and repair over simply clearing the light․
Using the Eraser Button
The Hyper Tough HT100 features a dedicated “Eraser” button for clearing Diagnostic Trouble Codes (DTCs) and turning off the Check Engine Light․ After successfully reading and recording DTCs, navigate to the erase function using the scanner’s menu – typically accessed after code retrieval․ Pressing the Eraser button initiates the clearing process, which may take a few seconds to complete․
The display will usually confirm successful erasure with a message like “DTCs Cleared” or similar․ Remember, erasing codes doesn’t repair the underlying issue․ It’s crucial to address the root cause of the problem․ Following erasure, perform a vehicle drive cycle to allow the onboard computer to re-evaluate system performance and confirm the repair․
HT100 Error Codes and Troubleshooting
The Hyper Tough HT100, while generally reliable, may occasionally display error messages․ Common issues include communication errors, often indicated by “No Communication” or “Link Error,” suggesting a poor connection to the vehicle’s OBD2 port․ Ensure the connector is firmly seated and the ignition is turned on․ If problems persist, try a different OBD2 port if available․
For more detailed error codes and solutions, consult the DDA Operation and Instruction Manual (P/N 550164)․ This manual provides specific troubleshooting steps for various error scenarios․ Power cycling the scanner or resetting it to factory defaults can sometimes resolve software glitches․ If the DDA gauge is the source of the error, refer to the DDA manual for specific guidance․
Common Error Messages and Solutions
Users report encountering issues like the HT100 failing to read codes, often stemming from a loose connection or an improperly positioned key․ Ensure the ignition is in the “ON” position, but the engine isn’t running․ A “No Response” message typically indicates a communication problem; try cleaning the OBD2 port and connector․
If the device powers on but displays garbled characters, a reset might be necessary․ Some users have found that restarting the vehicle can also resolve intermittent connectivity issues․ For persistent errors, referencing the DDA manual (P/N 550164) is crucial, as it details specific DDA-related error codes and their corresponding solutions․ Remember to check for software updates if available․
DDA Operation and Error Codes (Referencing DDA Manual P/N 550164)
The Hyper Tough HT100 utilizes a Data Display Assembly (DDA) for presenting diagnostic information․ When scanning with the DDA, specific error codes may arise, requiring consultation of the dedicated DDA Manual, part number 550164, for detailed explanations․ This manual provides in-depth troubleshooting steps for issues encountered during DDA gauge scanning․
Common DDA errors relate to communication failures between the reader and the vehicle’s system․ The manual outlines procedures for verifying power supply, cable connections, and data transmission protocols․ Understanding these codes is vital for accurate diagnosis․ Always prioritize the DDA manual for comprehensive error resolution, as it contains manufacturer-specific guidance beyond generic OBD2 code interpretations․
HT100 Specifications and Features
The Hyper Tough HT100 Code Reader is engineered for compatibility with all 1996 and newer OBD2 vehicles, supporting both generic and manufacturer-specific diagnostic trouble codes (DTCs)․ Key features include the ability to read and clear the Check Engine Light, facilitating quick vehicle maintenance․ The device boasts a user-friendly interface, designed for ease of operation even for novice users․
Regarding technical specifications, the HT100 operates on standard vehicle voltage (12V) and features a clear, easily readable screen․ While specific screen size details aren’t widely publicized, it’s designed for optimal visibility․ Its compact design allows for convenient storage․ The HT100 prioritizes functionality and reliability, offering essential diagnostic capabilities in a portable package․
Technical Specifications: Voltage, Screen Size, etc․
The Hyper Tough HT100 operates on a standard 12V vehicle power source, drawing power directly from the OBD2 port․ Detailed screen size specifications are not prominently available in public documentation, however, the display is designed for clear readability under various lighting conditions․ The device’s physical dimensions are compact, enhancing portability and ease of storage within a vehicle or toolbox․
The HT100’s construction utilizes durable materials to withstand typical automotive environments․ It doesn’t require batteries, simplifying operation․ While precise memory capacity isn’t specified, it’s sufficient for storing a reasonable number of DTC records․ The device’s internal components are optimized for low power consumption, ensuring reliable performance during diagnostic sessions․
HT100 vs․ Other Code Readers
Compared to more expensive professional-grade code readers, the Hyper Tough HT100 offers a compelling balance of functionality and affordability․ While lacking advanced features like bidirectional control or live data streaming found in higher-end models, it effectively performs core diagnostic tasks – reading and clearing DTCs․ Some competing readers boast larger displays or more extensive vehicle compatibility lists, but often at a significantly increased price point․
The HT100 distinguishes itself with its simplicity and ease of use, making it ideal for DIY mechanics․ Unlike some app-based solutions, it doesn’t require a smartphone or tablet connection․ It provides a dedicated, standalone diagnostic experience․ While it may not match the depth of analysis offered by professional tools, it’s a robust option for basic vehicle health checks and resolving common “Check Engine” light issues․
Maintenance and Care of Your HT100
To ensure the longevity and accurate performance of your Hyper Tough HT100 Code Reader, proper maintenance is crucial․ Regularly clean the device with a soft, dry cloth to remove dust and debris․ Avoid using harsh chemicals or abrasive cleaners, as these can damage the screen and casing․ Store the HT100 in a cool, dry place, away from direct sunlight and extreme temperatures․
Protect the connector from physical damage; avoid bending or stressing the pins․ When not in use, consider storing the unit in its original packaging or a protective case․ While software updates aren’t explicitly mentioned for this model, periodically check the manufacturer’s website for any available firmware improvements․ Proper care will help maintain the reliability of your diagnostic tool for years to come․
Cleaning and Storage
Maintaining the cleanliness of your Hyper Tough HT100 Code Reader is essential for optimal performance․ Regularly wipe down the device’s exterior with a soft, lint-free cloth․ For stubborn smudges, slightly dampen the cloth with water, ensuring no liquid enters the ports․ Avoid using harsh chemicals, solvents, or abrasive cleaners, as these can damage the plastic casing and screen․
When storing the HT100, choose a cool, dry location away from direct sunlight and extreme temperatures․ A protective case or the original packaging is recommended to prevent scratches and physical damage․ Disconnect the unit from any power source before long-term storage․ Proper cleaning and storage will contribute to the longevity and reliability of your diagnostic tool, ensuring accurate readings for years․

Software Updates (If Applicable)
Currently, information regarding software updates for the Hyper Tough HT100 Code Reader is limited․ Unlike some advanced diagnostic tools, the HT100 appears to operate with a fixed firmware version at the time of manufacture․ There is no mention of update capabilities within available documentation or user reports․ However, it’s always prudent to check the manufacturer’s website or retailer listings periodically for any potential future updates․
If updates were to become available, they would likely be distributed via a USB connection to a computer․ Always download updates from a trusted source to avoid malware․ Carefully follow any provided instructions during the update process to prevent damage to the device․ The absence of regular updates doesn’t diminish the HT100’s core functionality for reading and clearing basic OBD2 codes․
Hyper-V and Potential Conflicts
Hyper-V, a virtualization technology from Microsoft, can sometimes create conflicts with certain applications, particularly those requiring direct hardware access․ While the Hyper Tough HT100 Code Reader itself doesn’t directly interact with Hyper-V, issues may arise if the code reader’s software (if any is used on a PC) encounters problems within a Hyper-V virtual machine environment․ Specifically, running the HT100’s associated software inside a VM might lead to USB redirection issues or communication errors․
Enhanced Session Mode, offering improved USB redirection, could potentially mitigate these problems․ However, if conflicts persist, disabling Hyper-V or using a native operating system installation is recommended for reliable operation․ The core functionality of the HT100 device itself remains unaffected by Hyper-V’s presence․
Hyper-V Impact on Virtual Machines
Hyper-V significantly impacts virtual machines by creating a virtualized hardware environment․ When utilizing the Hyper Tough HT100 Code Reader within a virtual machine, potential issues stem from device passthrough and resource allocation․ If attempting to connect the HT100 directly to a VM, ensuring proper USB redirection is crucial; otherwise, the VM may not recognize the device․
RemoteFX, an older technology, is now outdated, and Enhanced Session Mode offers a superior experience with improved USB redirection and performance․ However, even with enhanced sessions, resource contention within the VM can affect the code reader’s functionality․ It’s important to allocate sufficient resources (CPU, memory) to the VM to ensure smooth operation․ Running the HT100’s software within the VM may also introduce latency․

Enhanced Session Mode and USB Redirection
Enhanced Session Mode is vital when using the Hyper Tough HT100 Code Reader within a Hyper-V virtual machine․ This mode essentially functions as a remote desktop, providing a more responsive and feature-rich experience compared to basic VM connections․ Crucially, it enables seamless USB redirection, allowing the VM to recognize and communicate with the HT100 as if it were directly connected to the host machine․
Without proper USB redirection, the virtual machine won’t detect the code reader․ Ensure the necessary integration services are installed on both the host and guest operating systems․ This facilitates audio and peripheral device sharing․ Enhanced Session Mode also addresses the lack of sound and USB support in older configurations, making diagnostics more efficient․ Properly configured, it provides a near-native experience for utilizing the HT100 within a virtualized environment․